Showing posts with label Browsers. Show all posts

Monday, 16 February 2015

The Best Free Browsers for Android

Name Your Link
firefox_android_home_panels_google_play.jpg

Also Read Facebook's Internet.org Comes to India: Everything You Need to Know

Ask people what makes a phone "smart" and you'll usually hear about apps - but for most of us, the app we use the most is still the browser. Both Google and Apple know this, and that is why both their default browsers are pretty good. Safari still rules the roost on iOS, and Google Chrome is great on Android.
Third-party alternatives are better at a few things do, such as addons, which makes them worth checking out. One shoe doesn't fit all and Android has enough alternatives available for anyone to find the browser they might need. Here are our top picks.
Google Chrome
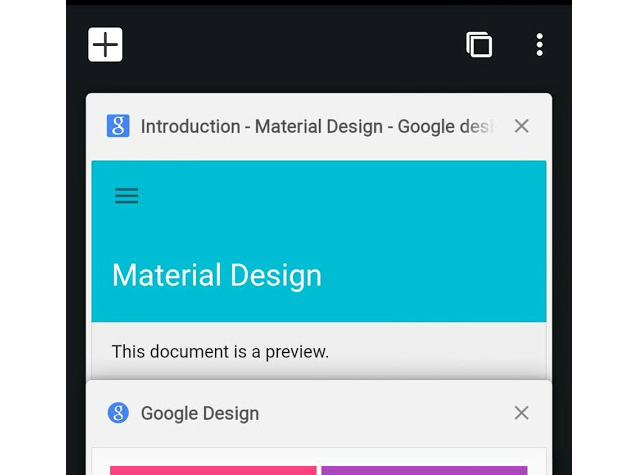
The default browser on Android is a good enough choice for the most part. Chrome's minimalist design is appealing, and you can sync all browser data across devices and platforms - all your bookmarks and passwords are saved across devices so you don't have to set it up from scratch. The browser also features voice search and a cool data compression feature. Customisation options are a little limited, but aside from this small drawback, Chrome delivers on all counts.

Download Google Chrome

google_chrome_android_google_play_screen.jpg
Firefox
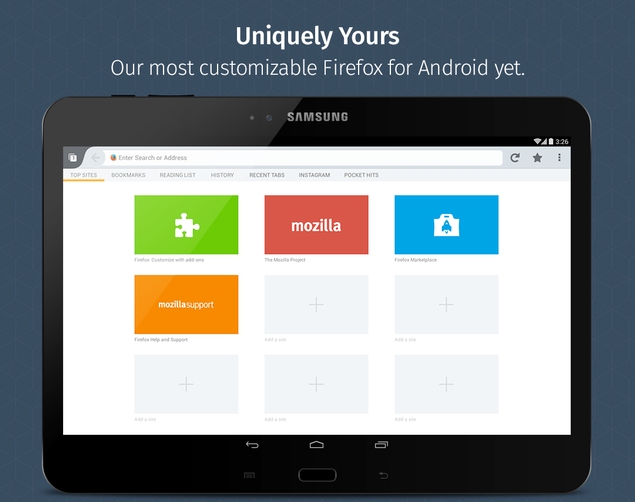
Mozilla Firefox for Android offers a polished and smooth browsing experience and it has a vast library of addons that will please power users. These addons add a lot of flexibility to the browser, allowing you to block ads, manage your passwords, or create custom gestures for common actions such as opening new tabs. Firefox also lets you save articles for offline reading and features a wide range of customisation options.

Also Read Swatch's Android-Compatible Smartwatch Won't Require Charging: CEO

Download Firefox

firefox_android_google_play.jpg
Hover Browser
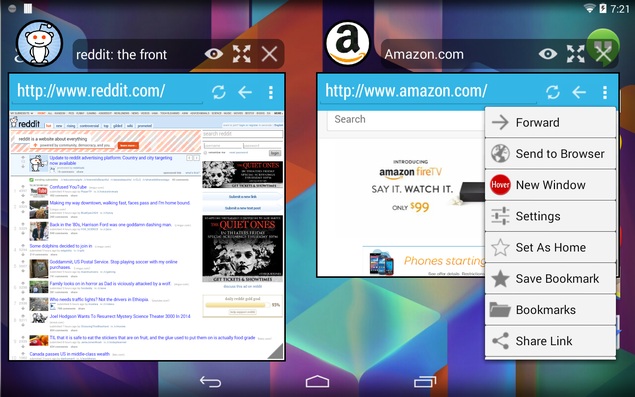
Hover Browser has one truly unique feature - it is a floating app. This means that it "hovers" over other apps, so you can use browse the Web while doing something else such as watching a movie or sending emails. The app did not run on an LG G3, but did work on other devices, but luckily, the G3 has a similar browser pre-installed. This is useful if you want to keep an eye on a webpage while using other apps. For example, you could work on document, while keeping cricket scores open in a corner.

Download Hover Browser

hover_browser_android_google_play.jpg
Opera Mini
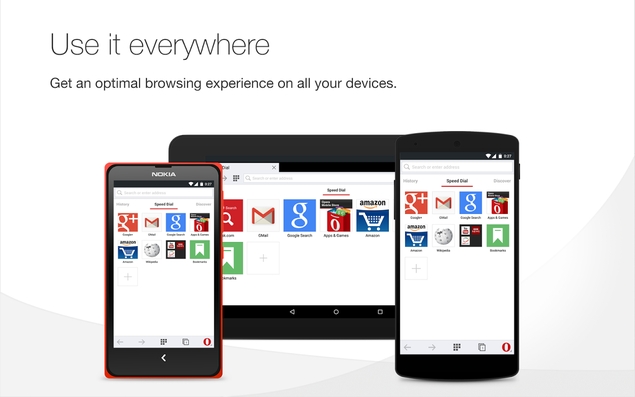
Opera Mini's interface has begun to look dated but that doesn't stop us from recommending it for those with low-end phones. The app takes up less than 4MB space after installation. It offers a data compression feature and lets you reduce quality of images on websites. This will help those facing Internet connectivity issues. The full Opera browser also has these features, and a much better interface, but it takes up more resources as well.

Download Opera MiniDownload Opera

opera_browser_android_google_play.jpg

CM Browser

Also Read Motorola Moto E (Gen 2) Leaked in Images; Expected to Launch at MWC

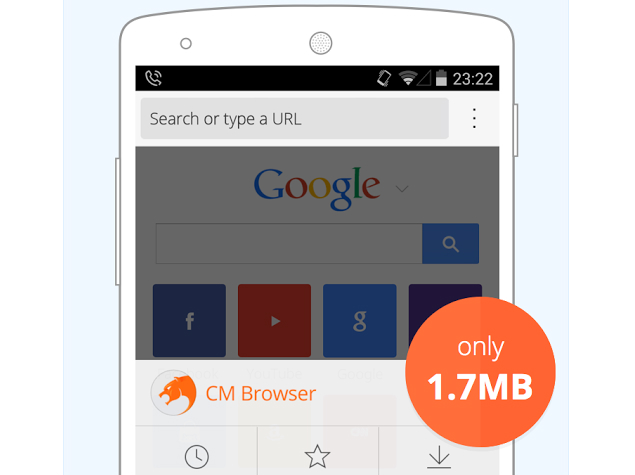
If you're using a phone that doesn't have too much storage, then CM Browser from Cheetah Mobile - the makers of Android antivirus app CM Security - is a good, lean choice. CM Browser offers a smooth browsing experience with a clean interface, and the app is just a 1.92MB download that takes around 5MB after installation. The interface is nicer compared to Opera Mini, making it a decent alternative.

Download CM Browser

cm_browser_android_size_google_play.png
UC Browser
UC Browser is one of the most popular Android browsers. It has some cool features that improve the browsing experience; for instance, it preloads webpages so they load quickly. It also tries to manage downloads and automatically resumes them if there is an Internet connection drop. UC Browser also integrates with Facebook to show you notifications, and has a host of in-app content like cricket scores.

Download UC Browser

uc_browser_android_tabs_google_play.png

These are the best browsers on Android, but there is one more that you might want to check out. Dolphin doesn't have a particular essential feature that makes it stand out, but it is a well-designed browser with some nice addons. For example, it lets you convert any webpage to PDF and even has Dropbox addon. Unlike Firefox, Dolphin's addons are on Google Play, so you'll have to install them like you install apps.


Also Read Lenovo A6000's First Sale Sees 10,000 Units Go Out of Stock in 2 Seconds

NOTE: Feel Free To Comment....
Unknown  /  at  09:06  /  No comments

Name Your Link
firefox_android_home_panels_google_play.jpg

Also Read Facebook's Internet.org Comes to India: Everything You Need to Know

Ask people what makes a phone "smart" and you'll usually hear about apps - but for most of us, the app we use the most is still the browser. Both Google and Apple know this, and that is why both their default browsers are pretty good. Safari still rules the roost on iOS, and Google Chrome is great on Android.
Third-party alternatives are better at a few things do, such as addons, which makes them worth checking out. One shoe doesn't fit all and Android has enough alternatives available for anyone to find the browser they might need. Here are our top picks.
Google Chrome
The default browser on Android is a good enough choice for the most part. Chrome's minimalist design is appealing, and you can sync all browser data across devices and platforms - all your bookmarks and passwords are saved across devices so you don't have to set it up from scratch. The browser also features voice search and a cool data compression feature. Customisation options are a little limited, but aside from this small drawback, Chrome delivers on all counts.

Download Google Chrome

google_chrome_android_google_play_screen.jpg
Firefox
Mozilla Firefox for Android offers a polished and smooth browsing experience and it has a vast library of addons that will please power users. These addons add a lot of flexibility to the browser, allowing you to block ads, manage your passwords, or create custom gestures for common actions such as opening new tabs. Firefox also lets you save articles for offline reading and features a wide range of customisation options.

Also Read Swatch's Android-Compatible Smartwatch Won't Require Charging: CEO

Download Firefox

firefox_android_google_play.jpg
Hover Browser
Hover Browser has one truly unique feature - it is a floating app. This means that it "hovers" over other apps, so you can use browse the Web while doing something else such as watching a movie or sending emails. The app did not run on an LG G3, but did work on other devices, but luckily, the G3 has a similar browser pre-installed. This is useful if you want to keep an eye on a webpage while using other apps. For example, you could work on document, while keeping cricket scores open in a corner.

Download Hover Browser

hover_browser_android_google_play.jpg
Opera Mini
Opera Mini's interface has begun to look dated but that doesn't stop us from recommending it for those with low-end phones. The app takes up less than 4MB space after installation. It offers a data compression feature and lets you reduce quality of images on websites. This will help those facing Internet connectivity issues. The full Opera browser also has these features, and a much better interface, but it takes up more resources as well.

Download Opera MiniDownload Opera

opera_browser_android_google_play.jpg

CM Browser

Also Read Motorola Moto E (Gen 2) Leaked in Images; Expected to Launch at MWC

If you're using a phone that doesn't have too much storage, then CM Browser from Cheetah Mobile - the makers of Android antivirus app CM Security - is a good, lean choice. CM Browser offers a smooth browsing experience with a clean interface, and the app is just a 1.92MB download that takes around 5MB after installation. The interface is nicer compared to Opera Mini, making it a decent alternative.

Download CM Browser

cm_browser_android_size_google_play.png
UC Browser
UC Browser is one of the most popular Android browsers. It has some cool features that improve the browsing experience; for instance, it preloads webpages so they load quickly. It also tries to manage downloads and automatically resumes them if there is an Internet connection drop. UC Browser also integrates with Facebook to show you notifications, and has a host of in-app content like cricket scores.

Download UC Browser

uc_browser_android_tabs_google_play.png

These are the best browsers on Android, but there is one more that you might want to check out. Dolphin doesn't have a particular essential feature that makes it stand out, but it is a well-designed browser with some nice addons. For example, it lets you convert any webpage to PDF and even has Dropbox addon. Unlike Firefox, Dolphin's addons are on Google Play, so you'll have to install them like you install apps.


Also Read Lenovo A6000's First Sale Sees 10,000 Units Go Out of Stock in 2 Seconds

NOTE: Feel Free To Comment....

Posted in: , , Read Complete Article»

Sunday, 6 July 2014

How to Back Up Your Firefox Profile Folder?

Your browser settings for Firefox and the bookmark file are stored on your desktop computer in a folder called “Profile.”  So what would happen to your settings if your hard drive crashes or the disk becomes corrupted?  Well, if that does happen, then your files may be overwritten or even lost. The upshot of that is; you will lose all of your Firefox bookmark settings, and data settings, etc. Don’t panic too much though! It is possible to prevent this data loss by backing up your Firefox profile folder.

Also Read How to Stop Google From Tracking You on the Web?

Backup your Data
This quick guide has been undertaken using Windows 7 as the operating system.  In order to back up the Firefox profile folder you need to configure your system to be able to view all files.  If your computer is not presently set toview all files, you can use Windows Explorer to enable this option by doing the following:
1) Click Start | All Programs.
2) Click Accessories.
3) Click Windows Explorer.
4) From the Tools menu, click Folder Options.
5) Click the View tab.
6) Double-click the folder called Hidden files and folders.
7) Click the radio button in front of the Show hidden files and folders option.
8) Click Apply & Click OK.
One you have enabled your system to view all files you should be able to navigate to the following path to find the Firefox profiles folder:
C:\Users\[User Name]\AppData\Roaming\Mozilla\Firefox\Profiles\
Now you just need to copy the Profiles folder to a USB Flash drive or other removable media to keep as your backup.  If you do have issues with your system at least now you can restore your browser settings.


Do Let us know about your experiences with our blog and give us feedback in our comment section.....


NOTE: Feel Free To Comment....
Unknown  /  at  13:56  /  No comments

Your browser settings for Firefox and the bookmark file are stored on your desktop computer in a folder called “Profile.”  So what would happen to your settings if your hard drive crashes or the disk becomes corrupted?  Well, if that does happen, then your files may be overwritten or even lost. The upshot of that is; you will lose all of your Firefox bookmark settings, and data settings, etc. Don’t panic too much though! It is possible to prevent this data loss by backing up your Firefox profile folder.

Also Read How to Stop Google From Tracking You on the Web?

Backup your Data
This quick guide has been undertaken using Windows 7 as the operating system.  In order to back up the Firefox profile folder you need to configure your system to be able to view all files.  If your computer is not presently set toview all files, you can use Windows Explorer to enable this option by doing the following:
1) Click Start | All Programs.
2) Click Accessories.
3) Click Windows Explorer.
4) From the Tools menu, click Folder Options.
5) Click the View tab.
6) Double-click the folder called Hidden files and folders.
7) Click the radio button in front of the Show hidden files and folders option.
8) Click Apply & Click OK.
One you have enabled your system to view all files you should be able to navigate to the following path to find the Firefox profiles folder:
C:\Users\[User Name]\AppData\Roaming\Mozilla\Firefox\Profiles\
Now you just need to copy the Profiles folder to a USB Flash drive or other removable media to keep as your backup.  If you do have issues with your system at least now you can restore your browser settings.


Do Let us know about your experiences with our blog and give us feedback in our comment section.....


NOTE: Feel Free To Comment....

Posted in: , , Read Complete Article»

Friday, 13 June 2014

Chrome Extension to Post Audio Comments and Voice Messages to Facebook


Facebook is the most popular social networking site and used by millions of users daily around the world. On Facebook, you can update status, share contents, and upload pictures and videos, but can you also post voice comments and messages on Facebook? Well, that’s possible only if you are a Google Chrome user.

Also Read Guide to Get Windows 8 System Recovery Option – Recovery Environment

Chrome store has an extension called Talk and Comment and as the name indicates, it helps you in posting voice comments and messages to Facebook. You can easily install and setup this extension from chrome store. Once done, you can continue posting audio comments and voice messages to Facebook.
Visit Chrome store, click on add and click install. Now Talk and comment will ask your permission to use your system microphone device, click on allow to give permission. Now whenever you will open your Facebook account you will see a mic icon beside comment box. Click and hold that icon until it turns red. Now record your voice comment and leave the button to upload it. Follow these steps for the same.

How to Post Audio Comments and Voice Messages to Facebook

Step 1: Install Talk and Comment Extension from Chrome Store
Step 2:  Click on, Free and then Click on Add.
talk-and-comment-allow
Step 3: Once installed, click on Allow

Also Read How to Watch Fifa World Cup 2014 Live on Your PC, Smartphone or Tablet

talk-and-comment-allow
Step 4: Now login to Facebook          
Step 5: Click and hold on Mic icon beside comment box until it turns red
talk-and-comment-mic-buttonStep 6: Record your message and leave Mic icon to upload the message
talk-and-comment-recording
Step 7: Once uploaded, you will receive a link for your voice comment.

Also Read How to Clean Facebook, Twitter, and Other Social Websites

talk-and-comment-link
Step 8: Just hit enter to post it as audio comment.
Step 9: You can hear the comment by clicking on play button.
talk-and-comment-play
Everyone (according to your privacy setting) can hear your comment. If they have Talk and Comment installed then they will see a playable button else, they will see a link to your comment opening in new window with a play button. Now enjoy this little fun trick and share this article with your friends.


Also Read How to Get – Use Cortana on Windows Phone 8.1 Outside US?

NOTE: Feel Free To Comment....
Unknown  /  at  16:03  /  No comments


Facebook is the most popular social networking site and used by millions of users daily around the world. On Facebook, you can update status, share contents, and upload pictures and videos, but can you also post voice comments and messages on Facebook? Well, that’s possible only if you are a Google Chrome user.

Also Read Guide to Get Windows 8 System Recovery Option – Recovery Environment

Chrome store has an extension called Talk and Comment and as the name indicates, it helps you in posting voice comments and messages to Facebook. You can easily install and setup this extension from chrome store. Once done, you can continue posting audio comments and voice messages to Facebook.
Visit Chrome store, click on add and click install. Now Talk and comment will ask your permission to use your system microphone device, click on allow to give permission. Now whenever you will open your Facebook account you will see a mic icon beside comment box. Click and hold that icon until it turns red. Now record your voice comment and leave the button to upload it. Follow these steps for the same.

How to Post Audio Comments and Voice Messages to Facebook

Step 1: Install Talk and Comment Extension from Chrome Store
Step 2:  Click on, Free and then Click on Add.
talk-and-comment-allow
Step 3: Once installed, click on Allow

Also Read How to Watch Fifa World Cup 2014 Live on Your PC, Smartphone or Tablet

talk-and-comment-allow
Step 4: Now login to Facebook          
Step 5: Click and hold on Mic icon beside comment box until it turns red
talk-and-comment-mic-buttonStep 6: Record your message and leave Mic icon to upload the message
talk-and-comment-recording
Step 7: Once uploaded, you will receive a link for your voice comment.

Also Read How to Clean Facebook, Twitter, and Other Social Websites

talk-and-comment-link
Step 8: Just hit enter to post it as audio comment.
Step 9: You can hear the comment by clicking on play button.
talk-and-comment-play
Everyone (according to your privacy setting) can hear your comment. If they have Talk and Comment installed then they will see a playable button else, they will see a link to your comment opening in new window with a play button. Now enjoy this little fun trick and share this article with your friends.


Also Read How to Get – Use Cortana on Windows Phone 8.1 Outside US?

NOTE: Feel Free To Comment....

Posted in: , , , Read Complete Article»

Sunday, 25 May 2014

Internet Explorer Zero-Day Flaw Discovered in 2013 Remains Unpatched By Microsoft

This is the second time in a one-month period that a vulnerability in Microsoft’s Internet Explorer has been exposed.The first one was announced in April, with Microsoft being quick to admit the problem. The company even shared emergency measures that users can take while waiting for the patch to be released officially. That’s over and done with, but yesterday, Zero Day Initiative released details of another Internet Explorer flaw.

Also Read Flappy Bird is Coming Back in August!

According to the announcement of Zero Day Initiative, they first heard of the vulnerability back in October of 2013. It was discovered by Belgian researcher Peter Van Eeckhoutte. The Initiative then immediately alerted Microsoft about the issue.
Internet Explorer Zero-Day Flaw Discovered in 2013 Remains Unpatched By Microsoft
By practice, the Initiative does not release such information to the public for about six months after informing the concerned party. This is to give the latter time to release a patch to address the issue.
Since it’s been a while since the Internet Explorer vulnerability has been pointed out to Microsoft, the Initiative gave the company notice on May 8 that they would announce the details to the public.
 It’s now been weeks since, and still nothing from Microsoft, so now we know. (Maybe Microsoft was too busy with the Surface Pro 3.)
Specifically, the vulnerability affects Internet Explorer 8, and “allows remote attackers to execute arbitrary code on vulnerable installations of Microsoft Internet Explorer. User interaction is required to exploit this vulnerability in that the target must visit a malicious page or open a malicious file.”

Also Read 6 Chrome Extensions to Help You Maximize Google Drive Usability

It is rather surprising that Microsoft has not done anything since they were informed of the flaw, especially considering that Internet Explorer 8 still has 20.85% share of the browser market. This is according to Net Market Share’s April report.
If you’re using IE 8, just be extra careful about the sites you visit, as the vulnerability requires the user to visit a page designed to take advantage of the flaw. Every link you receive – via email, chat message, or whatever – make sure you trust the source. Else, you just might become a victim of this flaw.


Also Read Windows 9 Preview To Come in Q2-Q3 2015

NOTE: Feel Free To Comment....
Unknown  /  at  14:37  /  No comments

This is the second time in a one-month period that a vulnerability in Microsoft’s Internet Explorer has been exposed.The first one was announced in April, with Microsoft being quick to admit the problem. The company even shared emergency measures that users can take while waiting for the patch to be released officially. That’s over and done with, but yesterday, Zero Day Initiative released details of another Internet Explorer flaw.

Also Read Flappy Bird is Coming Back in August!

According to the announcement of Zero Day Initiative, they first heard of the vulnerability back in October of 2013. It was discovered by Belgian researcher Peter Van Eeckhoutte. The Initiative then immediately alerted Microsoft about the issue.
Internet Explorer Zero-Day Flaw Discovered in 2013 Remains Unpatched By Microsoft
By practice, the Initiative does not release such information to the public for about six months after informing the concerned party. This is to give the latter time to release a patch to address the issue.
Since it’s been a while since the Internet Explorer vulnerability has been pointed out to Microsoft, the Initiative gave the company notice on May 8 that they would announce the details to the public.
 It’s now been weeks since, and still nothing from Microsoft, so now we know. (Maybe Microsoft was too busy with the Surface Pro 3.)
Specifically, the vulnerability affects Internet Explorer 8, and “allows remote attackers to execute arbitrary code on vulnerable installations of Microsoft Internet Explorer. User interaction is required to exploit this vulnerability in that the target must visit a malicious page or open a malicious file.”

Also Read 6 Chrome Extensions to Help You Maximize Google Drive Usability

It is rather surprising that Microsoft has not done anything since they were informed of the flaw, especially considering that Internet Explorer 8 still has 20.85% share of the browser market. This is according to Net Market Share’s April report.
If you’re using IE 8, just be extra careful about the sites you visit, as the vulnerability requires the user to visit a page designed to take advantage of the flaw. Every link you receive – via email, chat message, or whatever – make sure you trust the source. Else, you just might become a victim of this flaw.


Also Read Windows 9 Preview To Come in Q2-Q3 2015

NOTE: Feel Free To Comment....

Posted in: , Read Complete Article»

Saturday, 24 May 2014

10 Gmail Hacks to Help You Master Your Inbox

Gmail_hacks
Also Read

The popular email service, which will celebrate its 10th anniversary on April 1, can do more than just send messages. There are shortcuts, customizable options and quick hacks that all users can optimize, as long as they know how to find them.
We've rounded up 10 tips and tricks you can use to become even more of a Gmail genius.

1. Keyboard shortcutskeyboardHave you ever wished you could press a few quick keys to do all of your Gmail actions? The email service has you covered. Here's a detailed list of keyboard shortcuts you can enable, from selecting and deleting contacts to opening your drafts.

2. Undo sent messagesemail

Sometimes you click "send" too soon and have a mini panic attack. But did you know you can undo sent messages?
Also Read 
Here's how you unlock the option: Click on the gear icon on the righthand side, and then select Settings. Go to Labs, scroll down to Undo Send and choose to "enable."
Once you've saved that feature, test it out. (For Gmail newbies, the Labs section is where the creators test out new or interesting features, which could "change, break or disappear at any time." However, this feature has been around for at least four years.)
After sending a message, a yellow bar will appear at the top of your Gmail and say "Your message has been sent," and will offer you the option to "undo" or "view message." If you choose "undo," your message turns back into a draft. But be swift — the option will only hang around for a few seconds.

3. Search attachments onlypaperclip

If you're hunting for an email that had an attachment, add the code "has:attachment" to your query in the search bar. That way, your search will only pull up emails with attachments, so you don't have to wade through a sea of empty messages.

4. Canned responsescanned

If you find yourself sending the same email over and over, you might want to set up some automatic responses.
Once again, click the gear icon and select Settings. Go to the Labs section and scroll down for "Canned Responses." Once you enable the option and save, compose a new email. In the bottom right corner of the message box will be a small arrow (right next to the trash symbol). Click it and a list will pop up, with "Canned Responses" now showing up as an option. From there, you can create any automatic message, so it's right there waiting for you whenever you just want to click and go.
Also Read 

5. Quicker loadinghtml

If you need to check your email right this minute, but it's taking a while to load, switch over to the service's basic mode. By adding "/?ui=html" to the end of your url (using mail.google.com), it loads the version without Java Script.
However, that means many of your modern Gmail features won't function, but it will pull up your email in a shorter amount of time and allows you to employ basic actions.

6. Dots and plus signs don't matterplus-signThe email service has a bit of a blind spot when it comes to dots and plus signs in address usernames. It doesn't recognize the symbols, thus making them pretty pointless. However, you can use these blind spots to create ultra specific filters, according to this blog post from Gmail's official team.

If you put a plus sign after your email address, it doesn't affect anything (for example, if your username is myaccount@gmail.com, it would be the same as myaccount+mashable@gmail.com). This can help if you're signing up for something, such as subscribing to a newsletter or a new social media account. You could sign up with the username myaccount+newsletter@gmail.com, or myaccount+socialmedia.com, then create a filter for those emails.
Also Read 
The same goes for dots; using my.a.c.c.o.u.n.t@gmail.com is the same as myaccount@gmail.com.

7. Add or subtract inbox tabsinbox

In May 2013, Gmail updated its inbox by adding new tabs at the top. They filter your emails into "Primary," "Social" and "Promotions." However, those options are totally customizable.
If you hate the look of the tabs, click on the gear icon on the righthand side and select "Configure inbox." A box will pop up that allows you to deselect "Social" and "Promotions," leaving you with just your "Primary" inbox.
However, you'll also notice that you can select those three boxes, as well as "Updates" and "Forums." Tabaholics of the world just got a little happier.

8. Inbox count in your browser tabunreademailsHere's another tip for tab lovers. If you have dozens of tabs open in your browser and you want to find out how many emails you have without needing to click on the page, enable the "Unread message icon" lab.

Click over to your settings, click on "Labs" and scroll down to "Unread message icon." Enable and save the option, and a little number will pop up on the tab containing your inbox. That way, you'll always know how many emails you have while you're busy with other tasks.
Also Read 

9. Be a star

star

Gmail power users are more than familiar with the star function, which lets you quickly mark important messages. However, Gmail also has a broader star system with a wider range of star colors and symbols.

Head to your Settings, then hop down to "Stars." You can choose from a list of colorful stars and symbols such as exclamation points and check marks. If you're the type to color code everything, this will be a helpful tool.

10. Custom themesbackgroundThis is a tip that's hidden in broad daylight. If you're bored with your current Google background, upload one of your own images instead.

Also Read 
Go to the gear, click "Themes," then scroll to where it says "Custom Themes." From there you can click "Light" or "Dark," which refers to the color you want your emails and font to be. Then click "Select a background image," and you'll be able to drag or upload whatever image you want, and voilà — makeover complete.


Also Read 
NOTE: Feel Free To Comment....
Unknown  /  at  15:32  /  No comments

Gmail_hacks
Also Read

The popular email service, which will celebrate its 10th anniversary on April 1, can do more than just send messages. There are shortcuts, customizable options and quick hacks that all users can optimize, as long as they know how to find them.
We've rounded up 10 tips and tricks you can use to become even more of a Gmail genius.

1. Keyboard shortcutskeyboardHave you ever wished you could press a few quick keys to do all of your Gmail actions? The email service has you covered. Here's a detailed list of keyboard shortcuts you can enable, from selecting and deleting contacts to opening your drafts.

2. Undo sent messagesemail

Sometimes you click "send" too soon and have a mini panic attack. But did you know you can undo sent messages?
Also Read 
Here's how you unlock the option: Click on the gear icon on the righthand side, and then select Settings. Go to Labs, scroll down to Undo Send and choose to "enable."
Once you've saved that feature, test it out. (For Gmail newbies, the Labs section is where the creators test out new or interesting features, which could "change, break or disappear at any time." However, this feature has been around for at least four years.)
After sending a message, a yellow bar will appear at the top of your Gmail and say "Your message has been sent," and will offer you the option to "undo" or "view message." If you choose "undo," your message turns back into a draft. But be swift — the option will only hang around for a few seconds.

3. Search attachments onlypaperclip

If you're hunting for an email that had an attachment, add the code "has:attachment" to your query in the search bar. That way, your search will only pull up emails with attachments, so you don't have to wade through a sea of empty messages.

4. Canned responsescanned

If you find yourself sending the same email over and over, you might want to set up some automatic responses.
Once again, click the gear icon and select Settings. Go to the Labs section and scroll down for "Canned Responses." Once you enable the option and save, compose a new email. In the bottom right corner of the message box will be a small arrow (right next to the trash symbol). Click it and a list will pop up, with "Canned Responses" now showing up as an option. From there, you can create any automatic message, so it's right there waiting for you whenever you just want to click and go.
Also Read 

5. Quicker loadinghtml

If you need to check your email right this minute, but it's taking a while to load, switch over to the service's basic mode. By adding "/?ui=html" to the end of your url (using mail.google.com), it loads the version without Java Script.
However, that means many of your modern Gmail features won't function, but it will pull up your email in a shorter amount of time and allows you to employ basic actions.

6. Dots and plus signs don't matterplus-signThe email service has a bit of a blind spot when it comes to dots and plus signs in address usernames. It doesn't recognize the symbols, thus making them pretty pointless. However, you can use these blind spots to create ultra specific filters, according to this blog post from Gmail's official team.

If you put a plus sign after your email address, it doesn't affect anything (for example, if your username is myaccount@gmail.com, it would be the same as myaccount+mashable@gmail.com). This can help if you're signing up for something, such as subscribing to a newsletter or a new social media account. You could sign up with the username myaccount+newsletter@gmail.com, or myaccount+socialmedia.com, then create a filter for those emails.
Also Read 
The same goes for dots; using my.a.c.c.o.u.n.t@gmail.com is the same as myaccount@gmail.com.

7. Add or subtract inbox tabsinbox

In May 2013, Gmail updated its inbox by adding new tabs at the top. They filter your emails into "Primary," "Social" and "Promotions." However, those options are totally customizable.
If you hate the look of the tabs, click on the gear icon on the righthand side and select "Configure inbox." A box will pop up that allows you to deselect "Social" and "Promotions," leaving you with just your "Primary" inbox.
However, you'll also notice that you can select those three boxes, as well as "Updates" and "Forums." Tabaholics of the world just got a little happier.

8. Inbox count in your browser tabunreademailsHere's another tip for tab lovers. If you have dozens of tabs open in your browser and you want to find out how many emails you have without needing to click on the page, enable the "Unread message icon" lab.

Click over to your settings, click on "Labs" and scroll down to "Unread message icon." Enable and save the option, and a little number will pop up on the tab containing your inbox. That way, you'll always know how many emails you have while you're busy with other tasks.
Also Read 

9. Be a star

star

Gmail power users are more than familiar with the star function, which lets you quickly mark important messages. However, Gmail also has a broader star system with a wider range of star colors and symbols.

Head to your Settings, then hop down to "Stars." You can choose from a list of colorful stars and symbols such as exclamation points and check marks. If you're the type to color code everything, this will be a helpful tool.

10. Custom themesbackgroundThis is a tip that's hidden in broad daylight. If you're bored with your current Google background, upload one of your own images instead.

Also Read 
Go to the gear, click "Themes," then scroll to where it says "Custom Themes." From there you can click "Light" or "Dark," which refers to the color you want your emails and font to be. Then click "Select a background image," and you'll be able to drag or upload whatever image you want, and voilà — makeover complete.


Also Read 
NOTE: Feel Free To Comment....

Posted in: , , Read Complete Article»

Thursday, 22 May 2014

6 Chrome Extensions to Help You Maximize Google Drive Usability

Chrome-drive-extensions
Also Read How To Fix Limited or No Connectivity Problem in Windows 8?
The feature that lets users upload documents, images, spreadsheets and more has millions of neat little ways to boost your everyday activity. It's also a useful online warehouse that holds all the things you don't have space for on your computer.
Want to know how to boost its capabilities even more? Download these six nifty Chrome extensions that offer unique and handy features.

1. Fogpadfogpad


If you need to keep your documents as private as possible (you know, like that secret novel you've been working on), check out Fogpad. The free extension secures docs with an encryption and lets you protect them with private passwords.

Also Read How to Watch – Play YouTube Videos on VLC Player

2. Save to Google DriveGoogle Drive image


As the name suggests, Save to Google Drive lets users save web content or browser screenshots directly to their Drive accounts. Once you see a link or image you like, you can simply right-click it, and the option "Save Image to Google Drive" will magically appear.

3. Save Text to Google Drivesavetext


Here's another one with a straightforward name. This extension allows you to save text from a webpage directly onto your Drive. That awesome story you just read on Mashable? You'll never be without it when you save its text to your Drive docs.

Also Read Four Methods To Recover Corrupted Word File/Document On Windows

4. Shortcuts for Googleshortcuts


Here's an extension for the lazybones in all of us. If you want an easy way to navigate from Drive to one of Google's other services, such as Gmail or Calendar, or Google-owned sites such as YouTube and Picasa, install this shortcuts extension. A pop-up bar will show up next to your address bar, complete with icons that can take you where you want to go. No more cumbersome clicking back and forth between Drive and opening multiple tabs.

5. Pixlr Editor


Pixlr Editor

Also Read How to Fix Activation Error 0xC004F074 in Windows 8 and 8.1?

Work some photo editing magic with Pixlr Editor. You can crop, sharpen, blur and add filters to images, among a plethora of other options.

6. Black Menu


This extension may very well improve your overall Google experience, let alone Drive. It's a pop-up that appears on the side of your browser. Click it and you can search through anything in the Google universe, without leaving your original browser. That way, you don't have to open up multiple tabs if you want to search for something on YouTube, Google Maps, Gmail and, most importantly, your Drive.


Also Read How to Check if your PC can Run the Latest Games
NOTE: Feel Free To Comment....
Unknown  /  at  14:22  /  No comments

Chrome-drive-extensions
Also Read How To Fix Limited or No Connectivity Problem in Windows 8?
The feature that lets users upload documents, images, spreadsheets and more has millions of neat little ways to boost your everyday activity. It's also a useful online warehouse that holds all the things you don't have space for on your computer.
Want to know how to boost its capabilities even more? Download these six nifty Chrome extensions that offer unique and handy features.

1. Fogpadfogpad


If you need to keep your documents as private as possible (you know, like that secret novel you've been working on), check out Fogpad. The free extension secures docs with an encryption and lets you protect them with private passwords.

Also Read How to Watch – Play YouTube Videos on VLC Player

2. Save to Google DriveGoogle Drive image


As the name suggests, Save to Google Drive lets users save web content or browser screenshots directly to their Drive accounts. Once you see a link or image you like, you can simply right-click it, and the option "Save Image to Google Drive" will magically appear.

3. Save Text to Google Drivesavetext


Here's another one with a straightforward name. This extension allows you to save text from a webpage directly onto your Drive. That awesome story you just read on Mashable? You'll never be without it when you save its text to your Drive docs.

Also Read Four Methods To Recover Corrupted Word File/Document On Windows

4. Shortcuts for Googleshortcuts


Here's an extension for the lazybones in all of us. If you want an easy way to navigate from Drive to one of Google's other services, such as Gmail or Calendar, or Google-owned sites such as YouTube and Picasa, install this shortcuts extension. A pop-up bar will show up next to your address bar, complete with icons that can take you where you want to go. No more cumbersome clicking back and forth between Drive and opening multiple tabs.

5. Pixlr Editor


Pixlr Editor

Also Read How to Fix Activation Error 0xC004F074 in Windows 8 and 8.1?

Work some photo editing magic with Pixlr Editor. You can crop, sharpen, blur and add filters to images, among a plethora of other options.

6. Black Menu


This extension may very well improve your overall Google experience, let alone Drive. It's a pop-up that appears on the side of your browser. Click it and you can search through anything in the Google universe, without leaving your original browser. That way, you don't have to open up multiple tabs if you want to search for something on YouTube, Google Maps, Gmail and, most importantly, your Drive.


Also Read How to Check if your PC can Run the Latest Games
NOTE: Feel Free To Comment....

Posted in: , , Read Complete Article»

Wednesday, 30 April 2014

How to Easily Remove Unwanted Browser Toolbars


Whenever I am visiting a non-geek, a normal, non-tech savvy person, I am always amazed by the amount of useless toolbars I find in his/her computer. It’s like they always want to increase their collection, and burden their browsers even more. What happens is this – they download and install a lot of free programs that come with “gifts” or “add-ons”. And these gifts, many times happen to be toolbars that you actually don’t need.
And when you don’t expect it, you’ll end up searching on the web not using good ol’ Google – another company that wants to make a few bucks through advertising. Most people will go directly to Control Panel and uninstall what they have mistakenly downloaded from there. But there are some other methods, as well, such as toolbar removers or solutions found within the browsers.

Uninstall from Control Panel

This is the good old way that many of you probably know already. If you’re using a Windows operating system, you just need to go to Control Panel and the uninstall the naughty toolbars from there. The disadvantage of this method is that you have to manually select which software to uninstall and, sometimes, these toolbars can “hide” under names that won’t become suspicious at first sight.

Also Read MakeMyBrowser - Create Your Own Free Personalized Browser

So, let’s say I want to install the free version of Winamp and I’m not careful during the installation process. Winamp will add a toolbar of its own in my computer. When I realize I don’t need that toolbar, I go to Control Panel >Programs > Uninstall. And from there I pick the toolbar I want to remove.
remove winamp toolbar
But there are toolbars that somehow get past our careful unchecking process. And sometimes, they come with other free software that we don’t really need. For this matter, a dedicated toolbar remover software is much more useful than relying on the defaut solution.
Another advantage of these toolbar removal tools is that they completely wipe the unwanted program from your computer. Also, there are dedicated cleaners for certain browsers, which should assure a 100% “purification”. If you won’t delete these annoying additions, they will make your browsers crash. But before jumping on to them, let’s see what solutions we can find in our own browsers where we can find toolbar removers for every one of them. You can follow the step-by-step instructions written below or the associated screenshots.

TOOLBAR REMOVER FOR FIREFOX

If you have Firefox, then you should be able to get rid of toolbars much easier, if Firefox detects them as add-ons. You need to go to Tools, and then in  the Add-on section you’ll see the toolbars that you want gone. Here’s the complete instruction:
  1. Top of the Firefox window > click on Firefox button > Add-ons
  2. Select the Extensions panel
  3. Select the toolbar you want to disappear
  4. Click “Remove”
  5. Click Restart now if it pops up
remove toolbar firefox 1
remove toolbar firefox 2

Also Read How to transfer data Between two computers Using LAN Wire

TOOLBAR REMOVER FOR INTERNET EXPLORER

Someone might not like Internet Explorer on the basis that it isn’t as secure as other browsers. That probably was true with previous version but currently, IE is secure enough and also comes with the right steps to remove unwanted toolbars:
  1. Click Tools > Manage add-ons.
  2. Highlight Toolbars and Extensions below ‘Add-on Types’.
  3. Under  ‘Show:’ drop-down, make sure All add-ons is selected.
  4. Pick the toolbar you wish to remove, and choose Disable.
  5. Ignore the warning window.
remove toolbar internet explorer 1
remove toolbar internet explorer 2
remove toolbar internet explorer 3

TOOLBAR REMOVER FOR CHROME

The process on the Chrome browser is also very simple. What’s good is that using these methods you can also uninstall unwanted extension that you could’ve forgotten about. Here’s how to do it:
  1. Click the Chrome menu in the browser toolbar
  2. Click Tools
  3. Select Extensions
  4. Click the trash can icon near the extension you want removed
  5. Click ‘Remove’ on the confirmation dialog
remove toolbar chrome 1
remove toolbar chrome 2
remove toolbar chrome 3

Also Read How to disable or delay the lock(Login) screen in Windows 8

Best toolbar removers

For those of you that really want their computers clean and are very careful with what they have installed, then you might be interested in the following dedicated toolbar removers:


NOTE: Feel Free To Comment....

Unknown  /  at  16:40  /  No comments


Whenever I am visiting a non-geek, a normal, non-tech savvy person, I am always amazed by the amount of useless toolbars I find in his/her computer. It’s like they always want to increase their collection, and burden their browsers even more. What happens is this – they download and install a lot of free programs that come with “gifts” or “add-ons”. And these gifts, many times happen to be toolbars that you actually don’t need.
And when you don’t expect it, you’ll end up searching on the web not using good ol’ Google – another company that wants to make a few bucks through advertising. Most people will go directly to Control Panel and uninstall what they have mistakenly downloaded from there. But there are some other methods, as well, such as toolbar removers or solutions found within the browsers.

Uninstall from Control Panel

This is the good old way that many of you probably know already. If you’re using a Windows operating system, you just need to go to Control Panel and the uninstall the naughty toolbars from there. The disadvantage of this method is that you have to manually select which software to uninstall and, sometimes, these toolbars can “hide” under names that won’t become suspicious at first sight.

Also Read MakeMyBrowser - Create Your Own Free Personalized Browser

So, let’s say I want to install the free version of Winamp and I’m not careful during the installation process. Winamp will add a toolbar of its own in my computer. When I realize I don’t need that toolbar, I go to Control Panel >Programs > Uninstall. And from there I pick the toolbar I want to remove.
remove winamp toolbar
But there are toolbars that somehow get past our careful unchecking process. And sometimes, they come with other free software that we don’t really need. For this matter, a dedicated toolbar remover software is much more useful than relying on the defaut solution.
Another advantage of these toolbar removal tools is that they completely wipe the unwanted program from your computer. Also, there are dedicated cleaners for certain browsers, which should assure a 100% “purification”. If you won’t delete these annoying additions, they will make your browsers crash. But before jumping on to them, let’s see what solutions we can find in our own browsers where we can find toolbar removers for every one of them. You can follow the step-by-step instructions written below or the associated screenshots.

TOOLBAR REMOVER FOR FIREFOX

If you have Firefox, then you should be able to get rid of toolbars much easier, if Firefox detects them as add-ons. You need to go to Tools, and then in  the Add-on section you’ll see the toolbars that you want gone. Here’s the complete instruction:
  1. Top of the Firefox window > click on Firefox button > Add-ons
  2. Select the Extensions panel
  3. Select the toolbar you want to disappear
  4. Click “Remove”
  5. Click Restart now if it pops up
remove toolbar firefox 1
remove toolbar firefox 2

Also Read How to transfer data Between two computers Using LAN Wire

TOOLBAR REMOVER FOR INTERNET EXPLORER

Someone might not like Internet Explorer on the basis that it isn’t as secure as other browsers. That probably was true with previous version but currently, IE is secure enough and also comes with the right steps to remove unwanted toolbars:
  1. Click Tools > Manage add-ons.
  2. Highlight Toolbars and Extensions below ‘Add-on Types’.
  3. Under  ‘Show:’ drop-down, make sure All add-ons is selected.
  4. Pick the toolbar you wish to remove, and choose Disable.
  5. Ignore the warning window.
remove toolbar internet explorer 1
remove toolbar internet explorer 2
remove toolbar internet explorer 3

TOOLBAR REMOVER FOR CHROME

The process on the Chrome browser is also very simple. What’s good is that using these methods you can also uninstall unwanted extension that you could’ve forgotten about. Here’s how to do it:
  1. Click the Chrome menu in the browser toolbar
  2. Click Tools
  3. Select Extensions
  4. Click the trash can icon near the extension you want removed
  5. Click ‘Remove’ on the confirmation dialog
remove toolbar chrome 1
remove toolbar chrome 2
remove toolbar chrome 3

Also Read How to disable or delay the lock(Login) screen in Windows 8

Best toolbar removers

For those of you that really want their computers clean and are very careful with what they have installed, then you might be interested in the following dedicated toolbar removers:


NOTE: Feel Free To Comment....

Posted in: , , Read Complete Article»

About

This blog belong to all our youngster friendz, who believe in sharing their knowledge with others and want to try to hackin', crackin' , full version applications at free of cost.
you will found here valuable stuffs.

Labels

adf.ly blocked (1) android (109) Android and PC (19) android games (11) android news (3) android tricks (43) Antivirus (11) Anvsoft (1) apple (40) asha phones (1) avast (1) avast pro antivirus 8 2013 (1) avg (1) AVG pc tuneup 2013 full version (1) avira (1) blackberry (1) blogspot (2) body_language (1) bootable usb (1) Browsers (16) c cleaner pro + business (1) Cheatbook 2013 (1) Chetan Bhagat (1) compressor (1) crac (1) Crack (1) crack + keygen (2) cyberlink power2go full version (1) daemon tools 5.2 full version (1) daemon tools patch (1) defender (2) dictionary (1) direct link (1) DivX Pro 7 (1) Ebook (2) eset (1) etc (1) facebook (16) Firewall (2) free recharge tricks (1) free sms (1) FRUIT NINJA for windows full version (1) full version (8) Full Version MS Office 13 (1) GTA Sandreas (1) hack (4) hack pc (3) hacking using keylogger (1) hardware (1) hiDownload platinum 8 (1) how to (6) how to install .net (1) HTML (1) idm (1) idm crack (1) IDM full version (1) image editor (2) install .net in windows 8 (1) internet tricks (37) iPhone 5c (2) job (1) k j activator (1) kaspersky (2) keygen (2) leaked images (1) license key (1) manual updates (1) mediafire (1) MEDIAFIRE DOWNLOAD (2) mediafire link (2) mobiles (42) music player (1) nfs most wanted (1) Office 13 Activator (1) official site update (1) offline updates (1) patch (4) PC (3) pc customize (1) PC Drivers (2) pc games (15) pc games cheats (11) PC Software (152) PC tricks (146) PdaNET 3.50 (1) PDF (3) phone specifications (43) pic viewer (3) power iso 5.6 (1) premium zbigz account (1) problem with .net in windows 8 (1) review (11) reviews (2) Revolution 2020 PDF (1) science (2) sharebeast download (6) sharebeast link (2) symbian mobiles (2) tech knowledge (33) Tech News (343) tech reviews (146) Torrent To IDM (1) Tune-Up 2014 Full Version (1) Ubuntu Mobiles (1) video player (13) video tutorial (1) Web design (1) window 8.1 tricks (12) windows 8 activator (1) Windows 8 USB Installer Maker (1) windows phones (16) winrar 5 full version (1)
Copyright © 2014 SimplyGet. WP Theme-junkie converted by Bloggertheme9
Blogger templates. Proudly Powered by Blogger.